
[JS] 노마드코더 - 바닐라JS로 크롬 앱 만들기 (3.0 ~ 3.8)

- document
: 브라우저에 이미 존재하는 object (HTML을 가리키는 객체)
→ 콘솔 창에 document 입력하면 HTML 파일 내용을 볼 수 있다. (Javascript 관점으로 보여줌)
→ Javascript 에서 HTML에 접근할 수 있다.
document.title = "Hi"console 창, js 파일 에서 이렇게 입력하면 HTML의 title 내용이 바뀌게 된다.
- document.getElementById(”아이디이름”)
: string 타입의 아이디 이름을 받아서 호출
const title = document.getElementById("title");
console.log(title);
- document.getElementsByClassName(”클래스이름”)
: string 타입의 클래스 이름을 받아서 호출
→ h1 태그들이 Array 형태로 들어온다.
const hellos = document.getElementsByClassName("hello");
console.log(hellos);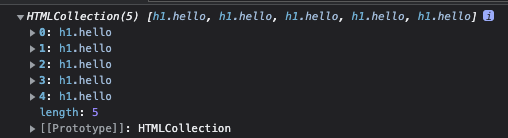
- document.getElementsByTagName(”태그 이름”)
: string 타입의 태그 이름을 받아서 호출
→ tag : anchor, div, section, button … 같은 것들을 의미한다.
const title = document.getElementsByTagName("h1");
console.log(title);
- querySelector
: element를 CSS 방식으로 검색할 수 있다. (단 하나의 element를 return)
→ 만약 여러 개가 있는데 qureySelector를 사용하면 제일 첫 번째 것만 return 된다.
const title = document.querySelector(".hello h1");
console.log(title);
cf.) 여러 개를 한 번에 가지고 오려면 querySelectorAll을 사용하면 된다. → Array 형태로 return
cf,) console.dir() : object로 표시한 element를 보여준다.
cf.) document의 body, head, title 같은 것들은 .을 사용해서 바로 불러올 수 있지만, 나머지 element들은 querySelector나 getElementById 같은 것들로 찾아와야 한다.
- addEventListener
: event를 listen하는 것
const title = document.querySelector("div.hello:first-child h1");

function handleTitleClick(){
    console.log("Title was clicked!");
}

title.addEventListener("click", handleTitleClick);
click 이라는 event를 listen하고 → click 이라는 event가 발생하면 → handleTitleClick 이라는 function 동작
(주의! function에 ()를 넣어주지 않는다.)

cf.) property 이름 앞에 on으로 시작 → event listener
cf.) mouseenter → 마우스 커서를 올렸을 때 발생하는 event
cf.) mouseleave → 마우스 커서를 내렸을 때 발생하는 event
cf.) 대부분 style은 CSS를 통해서 변경시킨다.
cf.) addEEventListener를 사용하면 removeEventListener를 통해서 제거가 편리하다.
- window
: 얘도 기본으로 제공해주는 것들 중 하나
function handleWindowResize(){
    document.body.style.backgroundColor = "tomato";
}

window.addEventListener("resize", handleWindowResize);
- if-else문 활용하여 글씨 컬러 바꾸기
const h1 = document.querySelector("div.hello:first-child h1");

function handleTitleClick(){
    const currnetColor = h1.style.color;
    let newColor;

    if(currnetColor === "blue"){
        newColor = "tomato";
    } else{
        newColor = "blue";
    }
    h1.style.color = newColor;
}


h1.addEventListener("click", handleTitleClick);
- CSS와 Javascript 같이 활용해보기
const h1 = document.querySelector("div.hello:first-child h1");

function handleTitleClick(){
    const clickedClass = "clicked"

    if(h1.className === clickedClass){
        h1.className = "";
    } else{
        h1.className = clickedClass;
    }
}

h1.addEventListener("click", handleTitleClick);
body{
background-color: beige;
}
h1{
color: cornflowerblue;
transition: color.5s ease-in-out;
.clicked{
color: tomato;
}

- classList
: class들의 목록으로 작업할 수 있게 해준다.
- classList.contains()
: class가 HTML element의 class에 포함되어 있는지 확인해준다
const h1 = document.querySelector("div.hello:first-child h1");

function handleTitleClick(){
    const clickedClass = "clicked"

    if(h1.classList.contains(clickedClass)){
        h1.classList.remove(clickedClass);
    } else{
        h1.classList.add(clickedClass);
    }
}

h1.addEventListener("click", handleTitleClick);
h1의 기존 class이름은 냅두고 그 뒤에 붙이려면 add로 추가
붙인걸 제거하려면 remove로 가능


- classList.toggle()
: class name이 존재하는지 확인해준다
(class name이 존재O → class name을 제거 / class name이 존재X → class name을 추가)
const h1 = document.querySelector("div.hello:first-child h1");

function handleTitleClick(){
    h1.classList.toggle("clicked");
}

h1.addEventListener("click", handleTitleClick);
위의 코드보다 짧으면서, 같은 기능을 수행한다.
'공부 > Javascript' 카테고리의 다른 글
| [JS] 노마드코더 - 바닐라JS로 크롬 앱 만들기 (4.2 ~ 4.7) (0) | 2022.07.30 |
|---|---|
| [JS] 노마드코더 - 바닐라JS로 크롬 앱 만들기 (4.0 ~ 4.1) (0) | 2022.07.30 |
| [JS] 노마드코더 - 바닐라JS로 크롬 앱 만들기 (2.8 ~ 2.16) (0) | 2022.07.30 |
| [JS] 노마드코더 - 바닐라JS로 크롬 앱 만들기 (2.4 ~ 2.7) (0) | 2022.07.30 |
| [JS] 노마드코더 - 바닐라JS로 크롬 앱 만들기 (1.1 ~ 2.3) (0) | 2022.07.30 |
댓글